Spline Profile
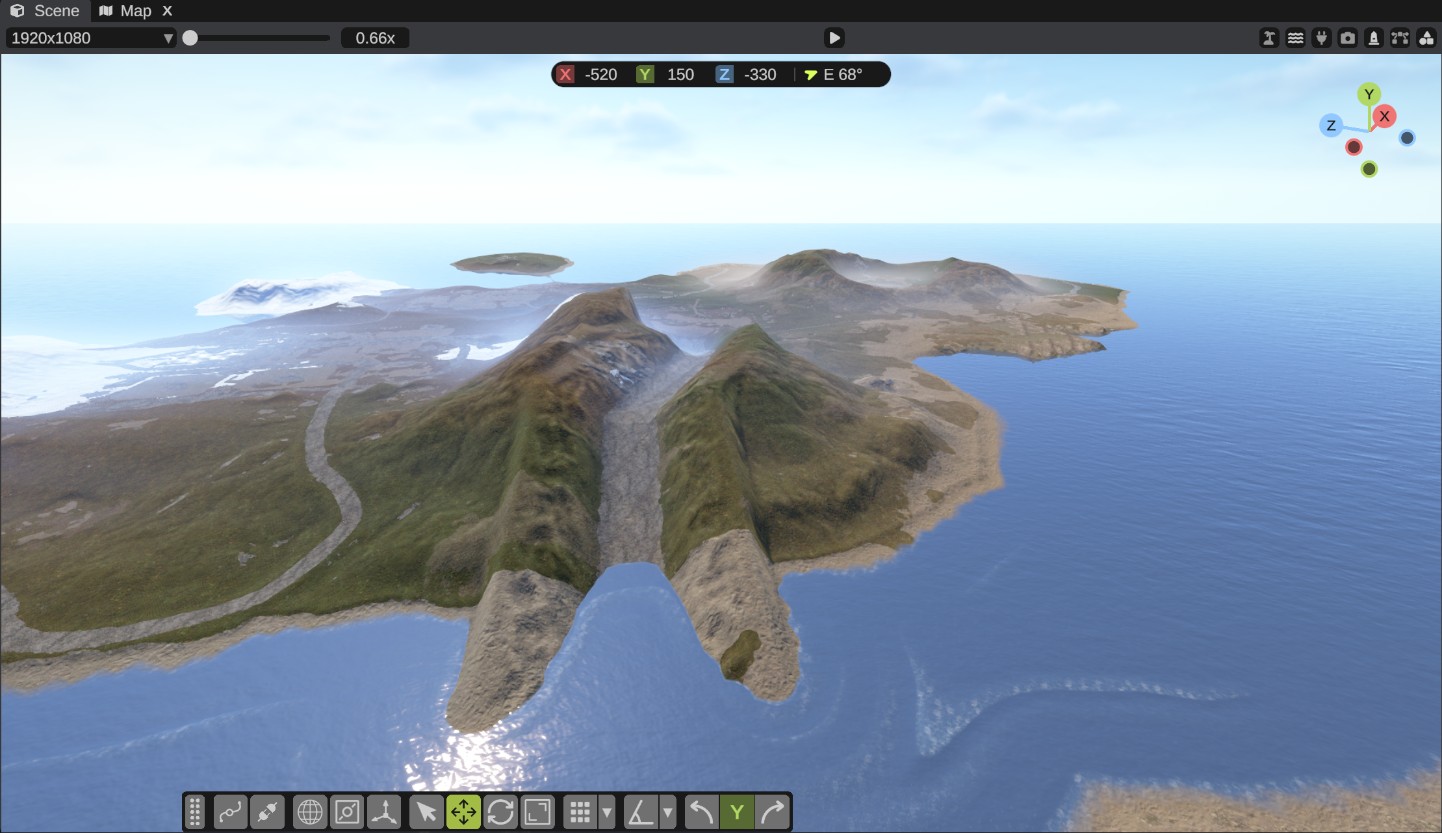
RustEdit ProA Graph Profile terrain spline changes the ground beside its line by a spline profile: a node graph that says what happens across the line and along it. Use it for shapes the other terrain splines cannot make, such as a canyon with rough walls, a raised rail bank or a road with uneven edges.
You build the graph in the Spline Profile window, with the same editor and nodes as the Terrain Graph. The change stays live, as with the other terrain splines. Move a knot and the ground follows. Edit the profile and every line that uses it changes at once.
Before you start
- You need RustEdit Pro or higher. Without it, the Graph Profile type is not in the type dropdown, the rows of a Graph Profile spline in a scene cannot be changed, Graph Profile splines in a scene do not change the terrain, and the Spline Profile window is not in the menu. See Free, Plus, Pro and Sponsor.
- Know how to draw and edit splines. See Editing Splines.
How to shape the ground with a profile
- Make a spline entity and draw the line, or select one you have.
- In the Inspector, click Terrain in the component buttons.
- In the Splines table, set the spline's Type to Graph Profile.
- Click the row. Its Settings tab shows.
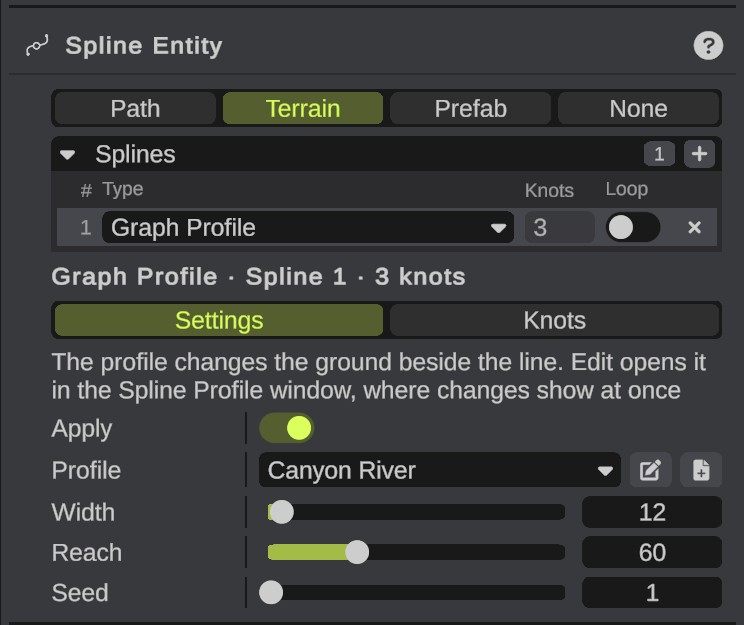
- Pick a profile in Profile, for example Canyon River. The ground beside the line changes at once.
- Set Reach: how far the profile reaches from the middle of the line, on each side. The example profiles say which reach they are made for. See The example profiles.
- To change the profile, click Edit beside the list. The Spline Profile window opens with the profile. Every change you make there shows on the terrain at once.
- In the window, click Save. The change stays for every line that uses the profile.
To start a profile of your own, click New beside the list instead. RustEdit makes a new profile file called Profile 1 (or the next free number), picks it for this spline and opens it in the window.
The Inspector rows
| Row | What it does |
|---|---|
| Apply | The spline changes the terrain. It is on for a new spline. It is off on splines from an exported map, because that terrain has the change already. |
| Profile | The spline profile the line uses: the files in the Spline Profiles folder, as they are now. A profile that is not in the folder stays in the list by its name, and the line does not change the ground. |
| Edit | The first small button beside Profile. Opens the profile in the Spline Profile window. Grayed out until you pick a profile. |
| New | The second small button beside Profile. Makes a new profile for this spline and opens it in the Spline Profile window. Undo takes the spline back to its old profile; the new file stays. |
| Width | The full width of the line in meters, 1 to 300. Default 10. The line itself does not use it: a profile can read it, for example for a flat road top. See Profile Input. The Terrain Graph's Spline Mask node uses it as the line's width too. |
| Reach | How far the profile reaches from the middle of the line, in meters, on each side. 1 to 200, default 30. Past the reach nothing changes. |
| Seed | 1 to 9999, default 1. Another number gives the profile's noise and random nodes another look. A Graph Seed node in the profile wins over it. |
The line above the rows says what the spline does, or that you need to pick a profile, or that the profile is not in the folder.
For how a profile's outputs change the ground across and along the line, see How a profile changes the ground.
The example profiles
RustEdit writes three example profiles into the Spline Profiles folder. Each is written once: if you change one, RustEdit does not write over it, and if you delete one, it does not come back.
| Profile | What it makes | Set |
|---|---|---|
| Canyon River | A river at the bottom of a deep V with rough walls. The bed is 25 meters under the line, with sand and gravel on it. River topology in the middle, Riverside up the walls. | Reach about 60. It does not use Width. |
| Raised Rail Bank | A bank 2 meters over the line with a flat top as wide as the line and 6 meter slopes, eased into the ground over 8 meters past their foot. Gravel on the top and the slopes. Rail on the top, Railside on the slopes. | Reach 25. Width is the width of the top. |
| Rough Road Edge | A flat road as wide as the line, at the line's height. The edge wobbles up to 1.5 meters in or out along the road. The shoulders dip 0.8 meters over 6 meters, then ease into the ground over the next 6. Gravel on the road, Dirt on the shoulders, Road and Roadside topology. | Reach 20. Width is the road's width. |
Open an example in the window to see how it is built, or save it under another name with Save As and change the copy.
Where profiles are kept
Each profile is one .splineprofile file in the Spline Profiles folder. By default, this is the SplineProfiles folder next to the RustEdit app. To use another folder, open , then Paths, and set Spline Profiles. It works without a restart. See Settings.
- A spline keeps only the profile's name, not the graph. A scene with Graph Profile splines needs their profile files to change the terrain: when you give the scene to someone, send the files along.
- To rename a profile, open it and use Save As with the new name, then pick the new name in the spline's Profile list. The old file stays.
- RustEdit sees a profile file that another program changed within about half a second, and builds the terrain again.
- Profile files are on your own computer. In a multiplayer session, each person needs the same file in their own Spline Profiles folder, or the line does not change their terrain. Edits in your Spline Profile window show only on your terrain until the others get the saved file.
Export and undo
- When you export the map, the exported terrain has the change of every Graph Profile spline with Apply on. Export turns Apply off in the map's copy of the spline, as for the other terrain splines. See Terrain Splines.
- Changes in the Inspector rows are undo steps in the map's history, and the terrain follows the undo.
- Edits in the Spline Profile window are undo steps in the graph's own history. See Graph Editor.
Troubleshooting
| Problem | What to do |
|---|---|
| The line does not change the ground. | Pick a profile in Profile, and check that Apply is on. Check the line above the rows: it says when the profile file is not in the Spline Profiles folder. The Notifications panel says it once too: "The profile ... is not in ...". |
| Height is wired but the ground does not move. | Wire Blend too. Without it, the height is left as it is. See Profile Output. |
| The Notifications panel says the profile "could not be read". | The file is not a spline profile, for example a .terraingraph file renamed. Open it in the Terrain Graph instead, or make the profile again. |
| The ground ends in a step at the reach. | Let Blend fall to 0 before Distance 0-1 reaches 1. Or raise Reach. |
| My edits in the window do not show on the terrain. | The window must show the same file the spline uses, from the Spline Profiles folder. A new profile that is not saved yet, or a file from another folder, is used by no spline. |
| My edits went away. | Changes that are not saved stay only while the window shows the profile. Click Save before you close the window. |
| A custom node is not in the Add Node menu. | It holds a node a profile cannot hold, such as Current Map. See Nodes. |