Terrain Chunks
RustEdit PlusA terrain chunk is a piece of ready-made ground, such as a mountain, a canyon, sand dunes or an island. You place it from the Content Browser like a prefab. It puts its own height, ground textures and biome onto the terrain where it stands. Move it, turn it or make it bigger, and its ground follows.
RustEdit comes with 49 chunks. See Built-in Terrain Chunks for the list. You can also make your own.
Before you start
- You need RustEdit Plus or higher. Without it, the Terrain Chunks folder is not in the Content Browser or its search. See Free, Plus, Pro and Sponsor.
- A chunk changes the height, splat and biome maps only. It does not change the topology or the alpha. Paint those yourself with the paint tools, for example Beach on the beach of an island.
Place a terrain chunk
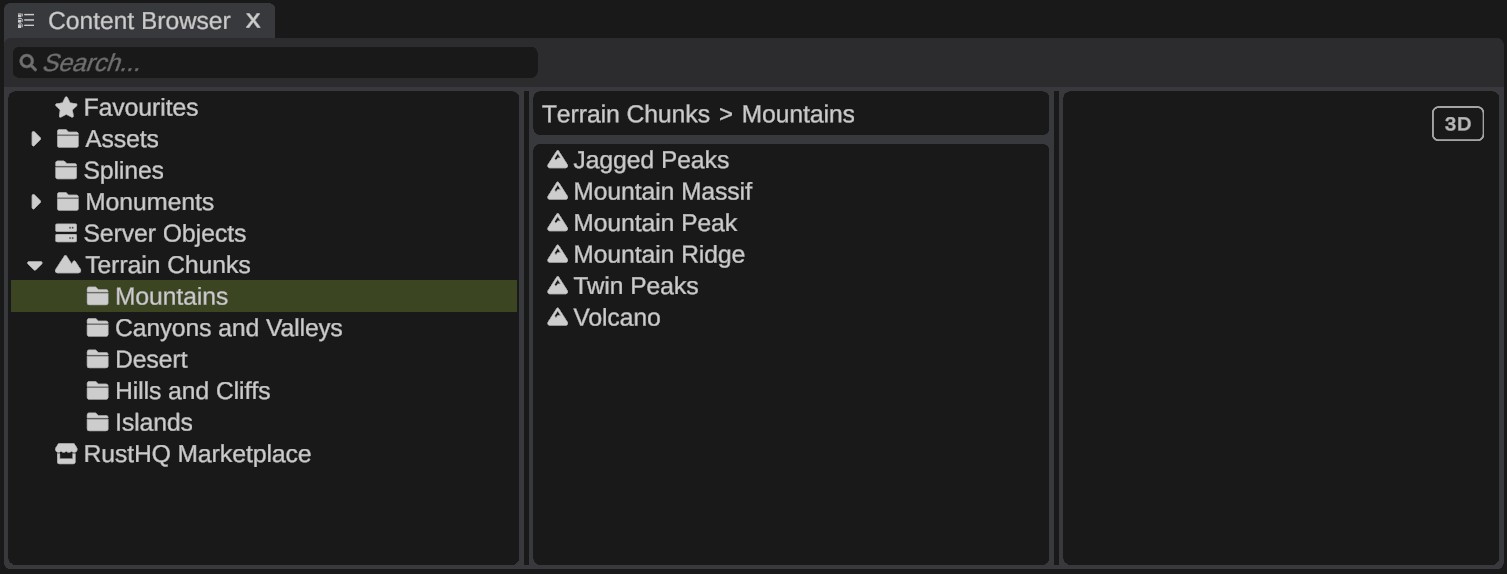
- Open the Content Browser and click the Terrain Chunks folder. It has a folder for each kind of ground, such as Mountains and Islands.
- Open a kind's folder. The list shows its chunks.
- Drag a chunk into the scene view. The chunk follows the pointer, but the ground does not change yet.
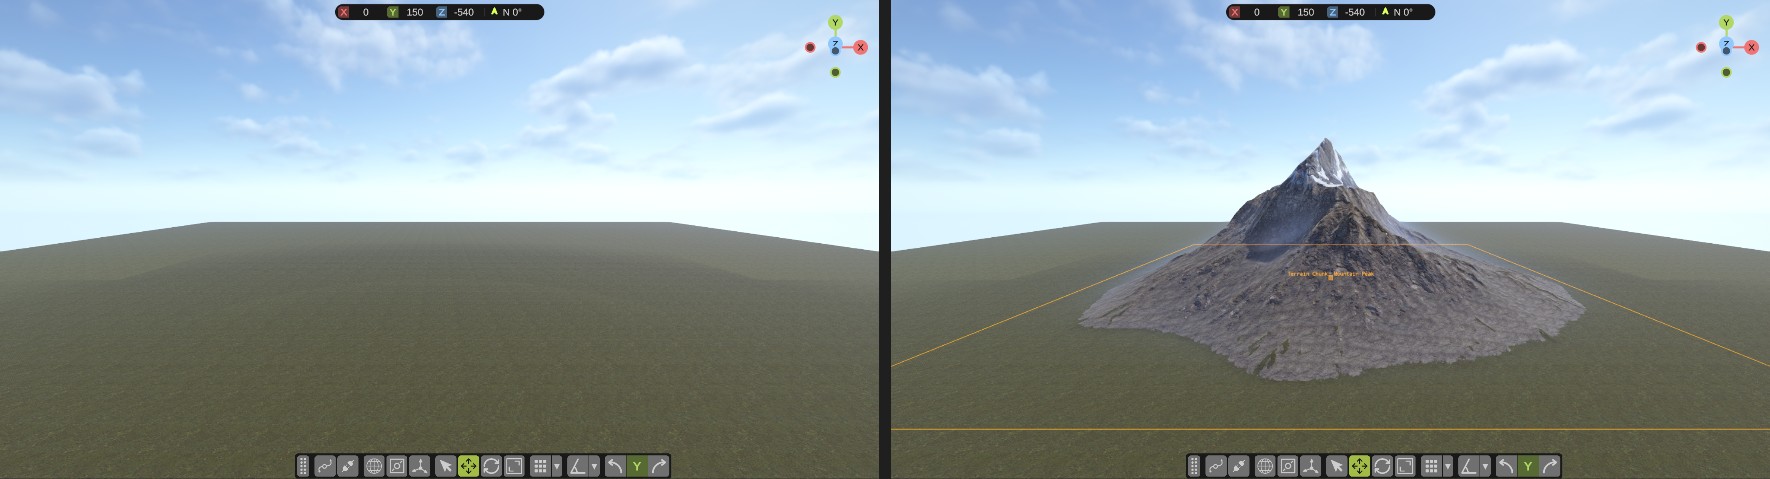
- Let go of the mouse button. RustEdit puts the chunk's ground onto the terrain where you dropped it, and selects the chunk.
You can also double-click a chunk, or right-click it and click Place in Scene. RustEdit places it in the middle of the view.
A new chunk faces the way the camera looks. Its base sits at the point where you placed it, usually on the ground. Every map the chunk has is switched on: unlike a Rust prefab, a chunk changes the terrain as soon as you place it.
Chunk rows have no preview picture and no favorite star.
In the scene view
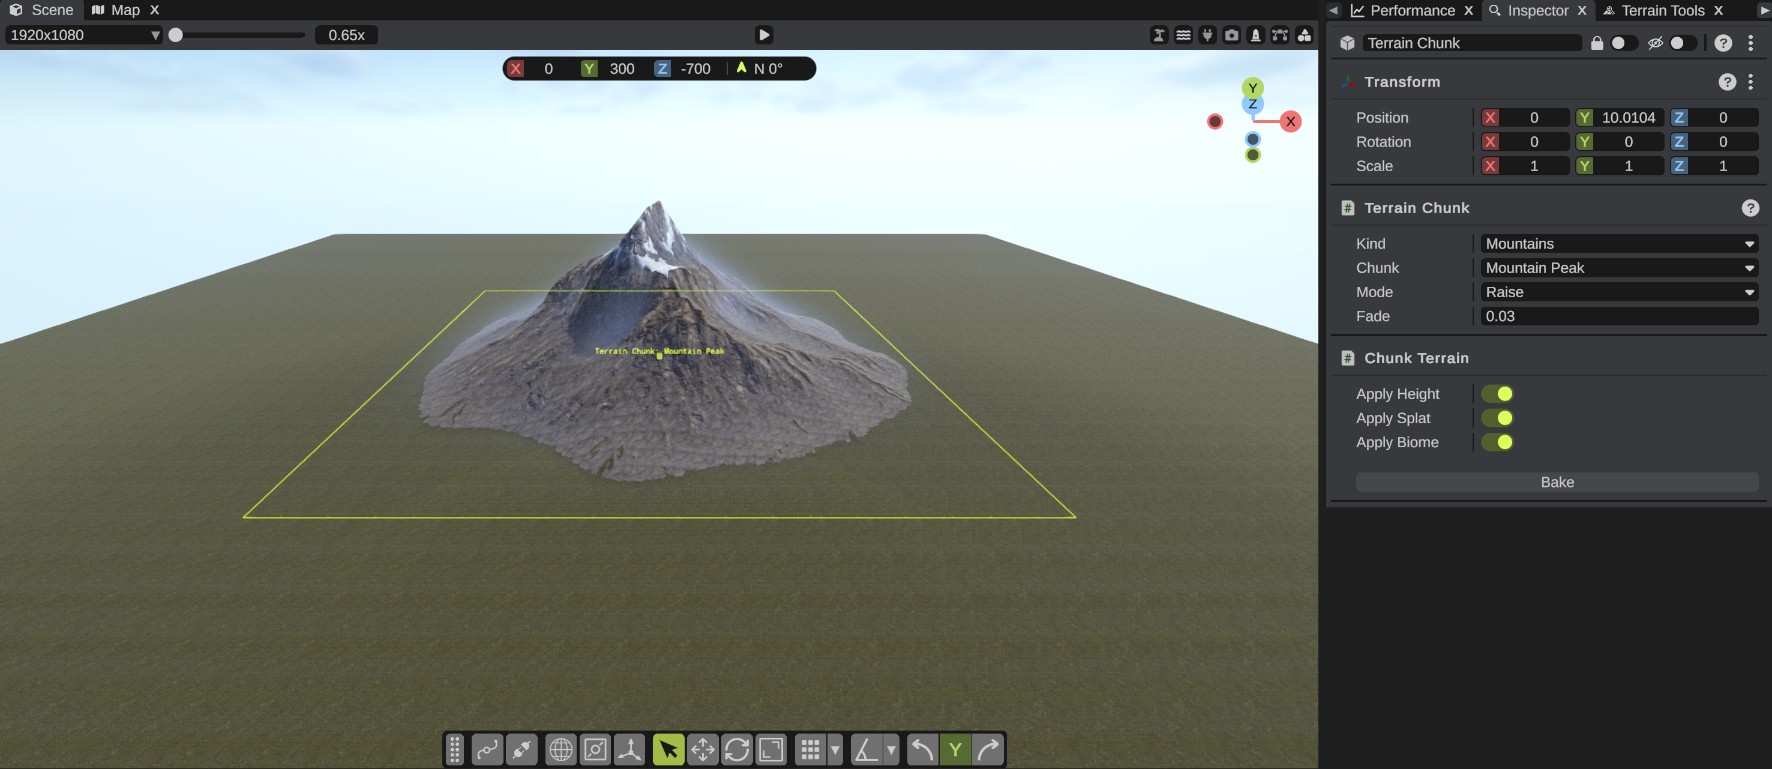
A chunk shows as an orange outline on the ground around the area it covers, with an orange box in its middle. Click the box to select the chunk.
The text over the box names the chunk, for example "Terrain Chunk: Mountain Peak". It shows while the chunk is selected. It also shows when the camera is nearer to the chunk than the chunk's size from corner to corner. For a small chunk, that distance is still at least 60 m.
The Terrain Chunk panel
Select a chunk to see its settings in the Inspector.
| Option | What it does |
|---|---|
| Kind | The kind of ground, such as Mountains. The Chunk list shows the chunks of this kind. When you pick another kind, the chunk changes to the first chunk of that kind. |
| Chunk | The ground it puts onto the terrain. When you pick a chunk, Mode and Fade change to that chunk's own values, and every map it has is switched on. |
| Mode | How its height meets the map's ground: Blend, Raise, Lower or Add. See Modes. |
| Fade | The part of the chunk's size that its edge fades over, from 0 to 0.5. For example, 0.05 on a chunk 1000 m wide fades the outer 50 m on each side. The default is the chunk's own value. |
Changes to these four options are not undo steps. Ctrl+Z does not bring the old value back.
Modes
| Mode | What it does |
|---|---|
| Blend | The chunk's ground takes the place of the map's ground. |
| Raise | The chunk changes the ground only where it is higher than the map. Use it for mountains, rocks and islands. |
| Lower | The chunk changes the ground only where it is lower than the map. Use it for canyons, valleys and pits. |
| Add | The chunk's heights go on top of the map's ground, which keeps its own shape. Use it for dunes and hills. In this mode the chunk's height (its Y position) does not matter. |
With Raise and Lower, the chunk paints its splat and biome only where its own ground shows. So a mountain does not paint the flat ground around its foot. With Blend and Add, or with Apply Height off, the chunk paints over its whole area.
Move, turn and size a chunk
Use the gizmo or type values in the Transform panel, as for a prefab. See Move, Rotate and Scale.
| Value | What it does to the chunk |
|---|---|
| Position X and Z | Where the middle of the chunk is. |
| Position Y | The height of the chunk's base. A mountain's base is its foot. A canyon's base is its rim. An island's base is its beach. |
| Rotation Y | Turns the chunk. The X and Z rotation do nothing: the chunk's ground always lies flat. |
| Scale X and Z | Make the chunk wider and longer. |
| Scale Y | Makes the chunk taller. 2 doubles its height, 0.5 halves it. |
The scale handles work at the chunk's size. To double a chunk at scale 1, drag a handle about half the chunk's width. The center cube of the scale gizmo scales X, Y and Z together, so the chunk also gets taller. Drag the X and Z cubes to make it wider only.
While you drag, the outline moves with the chunk, but the ground waits. RustEdit builds the ground again once you let go of the mouse button. This also happens after a typed value, an undo or redo, and a change made by an AI app. A big chunk can take a moment.
The Chunk Terrain panel
The Chunk Terrain panel has one switch for each map the chunk has:
| Switch | What it does |
|---|---|
| Apply Height | Puts the chunk's shape onto the terrain. |
| Apply Splat | Paints the chunk's ground textures. |
| Apply Biome | Sets the chunk's biomes. Only chunks that have their own biome show this switch. |
Turn a switch off to leave that map alone. For example, turn off Apply Splat to keep your own ground textures on a chunk's slopes.
Bake
Bake writes the chunk's ground into the map's own terrain for good, and turns the chunk's switches off. Bake a chunk when you want to sculpt or paint its ground with the Terrain Tools. See Bake for how it works and how to undo it.
Delete, save and export
- Delete a chunk and its ground goes away. Ctrl+Z brings both back.
- The scene file keeps the chunks with all their settings. See Scenes and Maps.
- When you export the map, the
.mapfile has the chunks' ground in its terrain. The chunks themselves are not exported, whichever Entities choice you pick. When you open the exported map, the ground is there, but there is no chunk to move. - A scene remembers each chunk by the name of the chunk's folder. If you open a scene that uses a chunk you do not have, for example a chunk someone else made, the chunk stays in the scene but puts no ground on the terrain. Its text shows the folder name. Copy that chunk's folder into your Terrain Chunks folder and restart RustEdit. See Make Your Own Terrain Chunk.
Islands
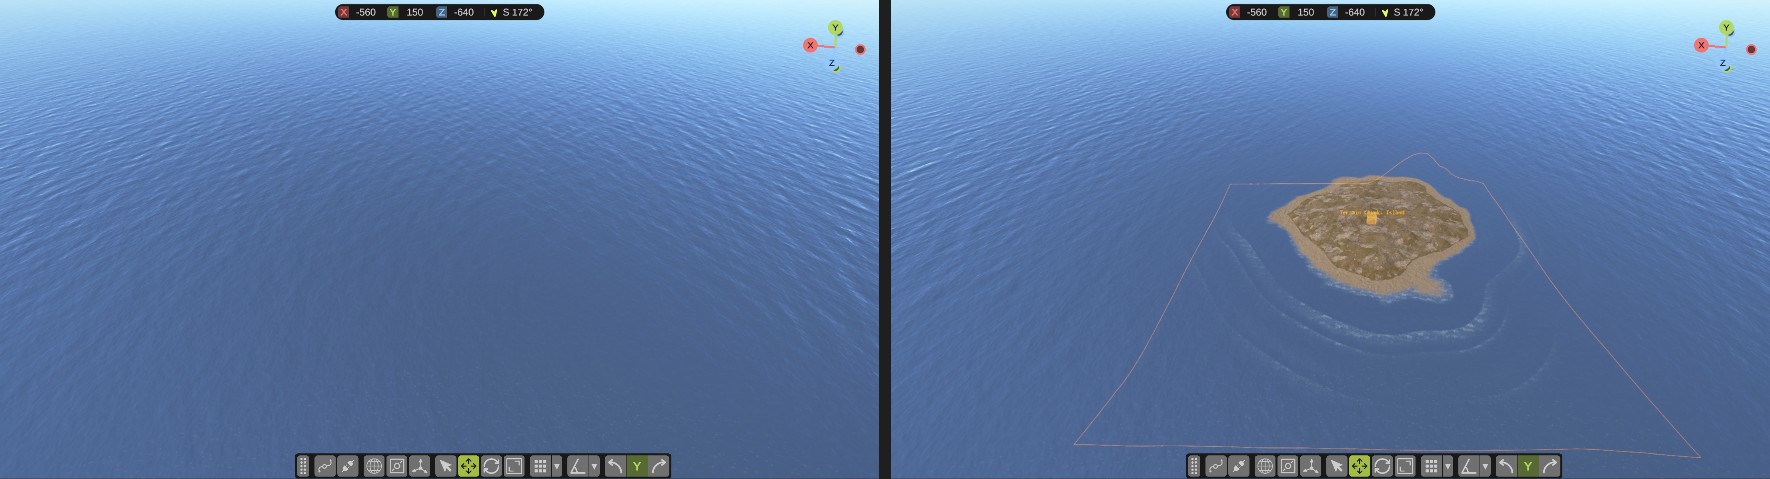
The base of an island chunk is its beach. Put the island at height 0 and its beach meets the sea.
- Place an island chunk over the sea.
- In the Transform panel, set Position Y to
0. RustEdit builds the island. The beach is at sea level, and the shallow shelf around the island is under the water.
The Fjord and Sea Stacks chunks also go at height 0. The fjord's floor is then under the sea. Before you turn it, the fjord opens to the sea at its west end. The reef of the sea stacks is just under the sea.
Troubleshooting
| Problem | What to do |
|---|---|
| A chunk puts no ground on the terrain, and the Notifications panel says "The terrain chunk '...' is not in ...". | The scene uses a chunk that is not on this computer. Copy its folder into your Terrain Chunks folder and restart RustEdit. |
| A chunk changes nothing. | Check that its switches in the Chunk Terrain panel are on. After a Bake they are off. |
| Sculpting under a chunk does not show. | The chunk's ground lies on top of the map's own terrain. Turn Apply Height off, or Bake the chunk first. |
| An island's beach is under the water or high above it. | Set Position Y to 0. |
| Your own chunk is not in the Content Browser, or its slopes look like steps. | See Make Your Own Terrain Chunk. |